Coat Closet Makeover!
HELLO HELLO my lovely readers! It’s been a much longer break from blog posts than I initially anticipated, and for that I am sorry for leaving you in the dark. I hope that some of you were able to follow along with what I have been working on in our house via social media. From mid-summer until now it has been a hectic handful of months. My husband and I were taking advantage of the nice outdoor weather while we could for projects while also juggling a lot of social events in our lives. It had felt quite overwhelming to also be creating blog posts during that time, and the last thing I wanted to do was throw together posts I wouldn’t be proud of. So as I sit with a tiny moment to breathe this week, I figured I’d share the information about our front closet.
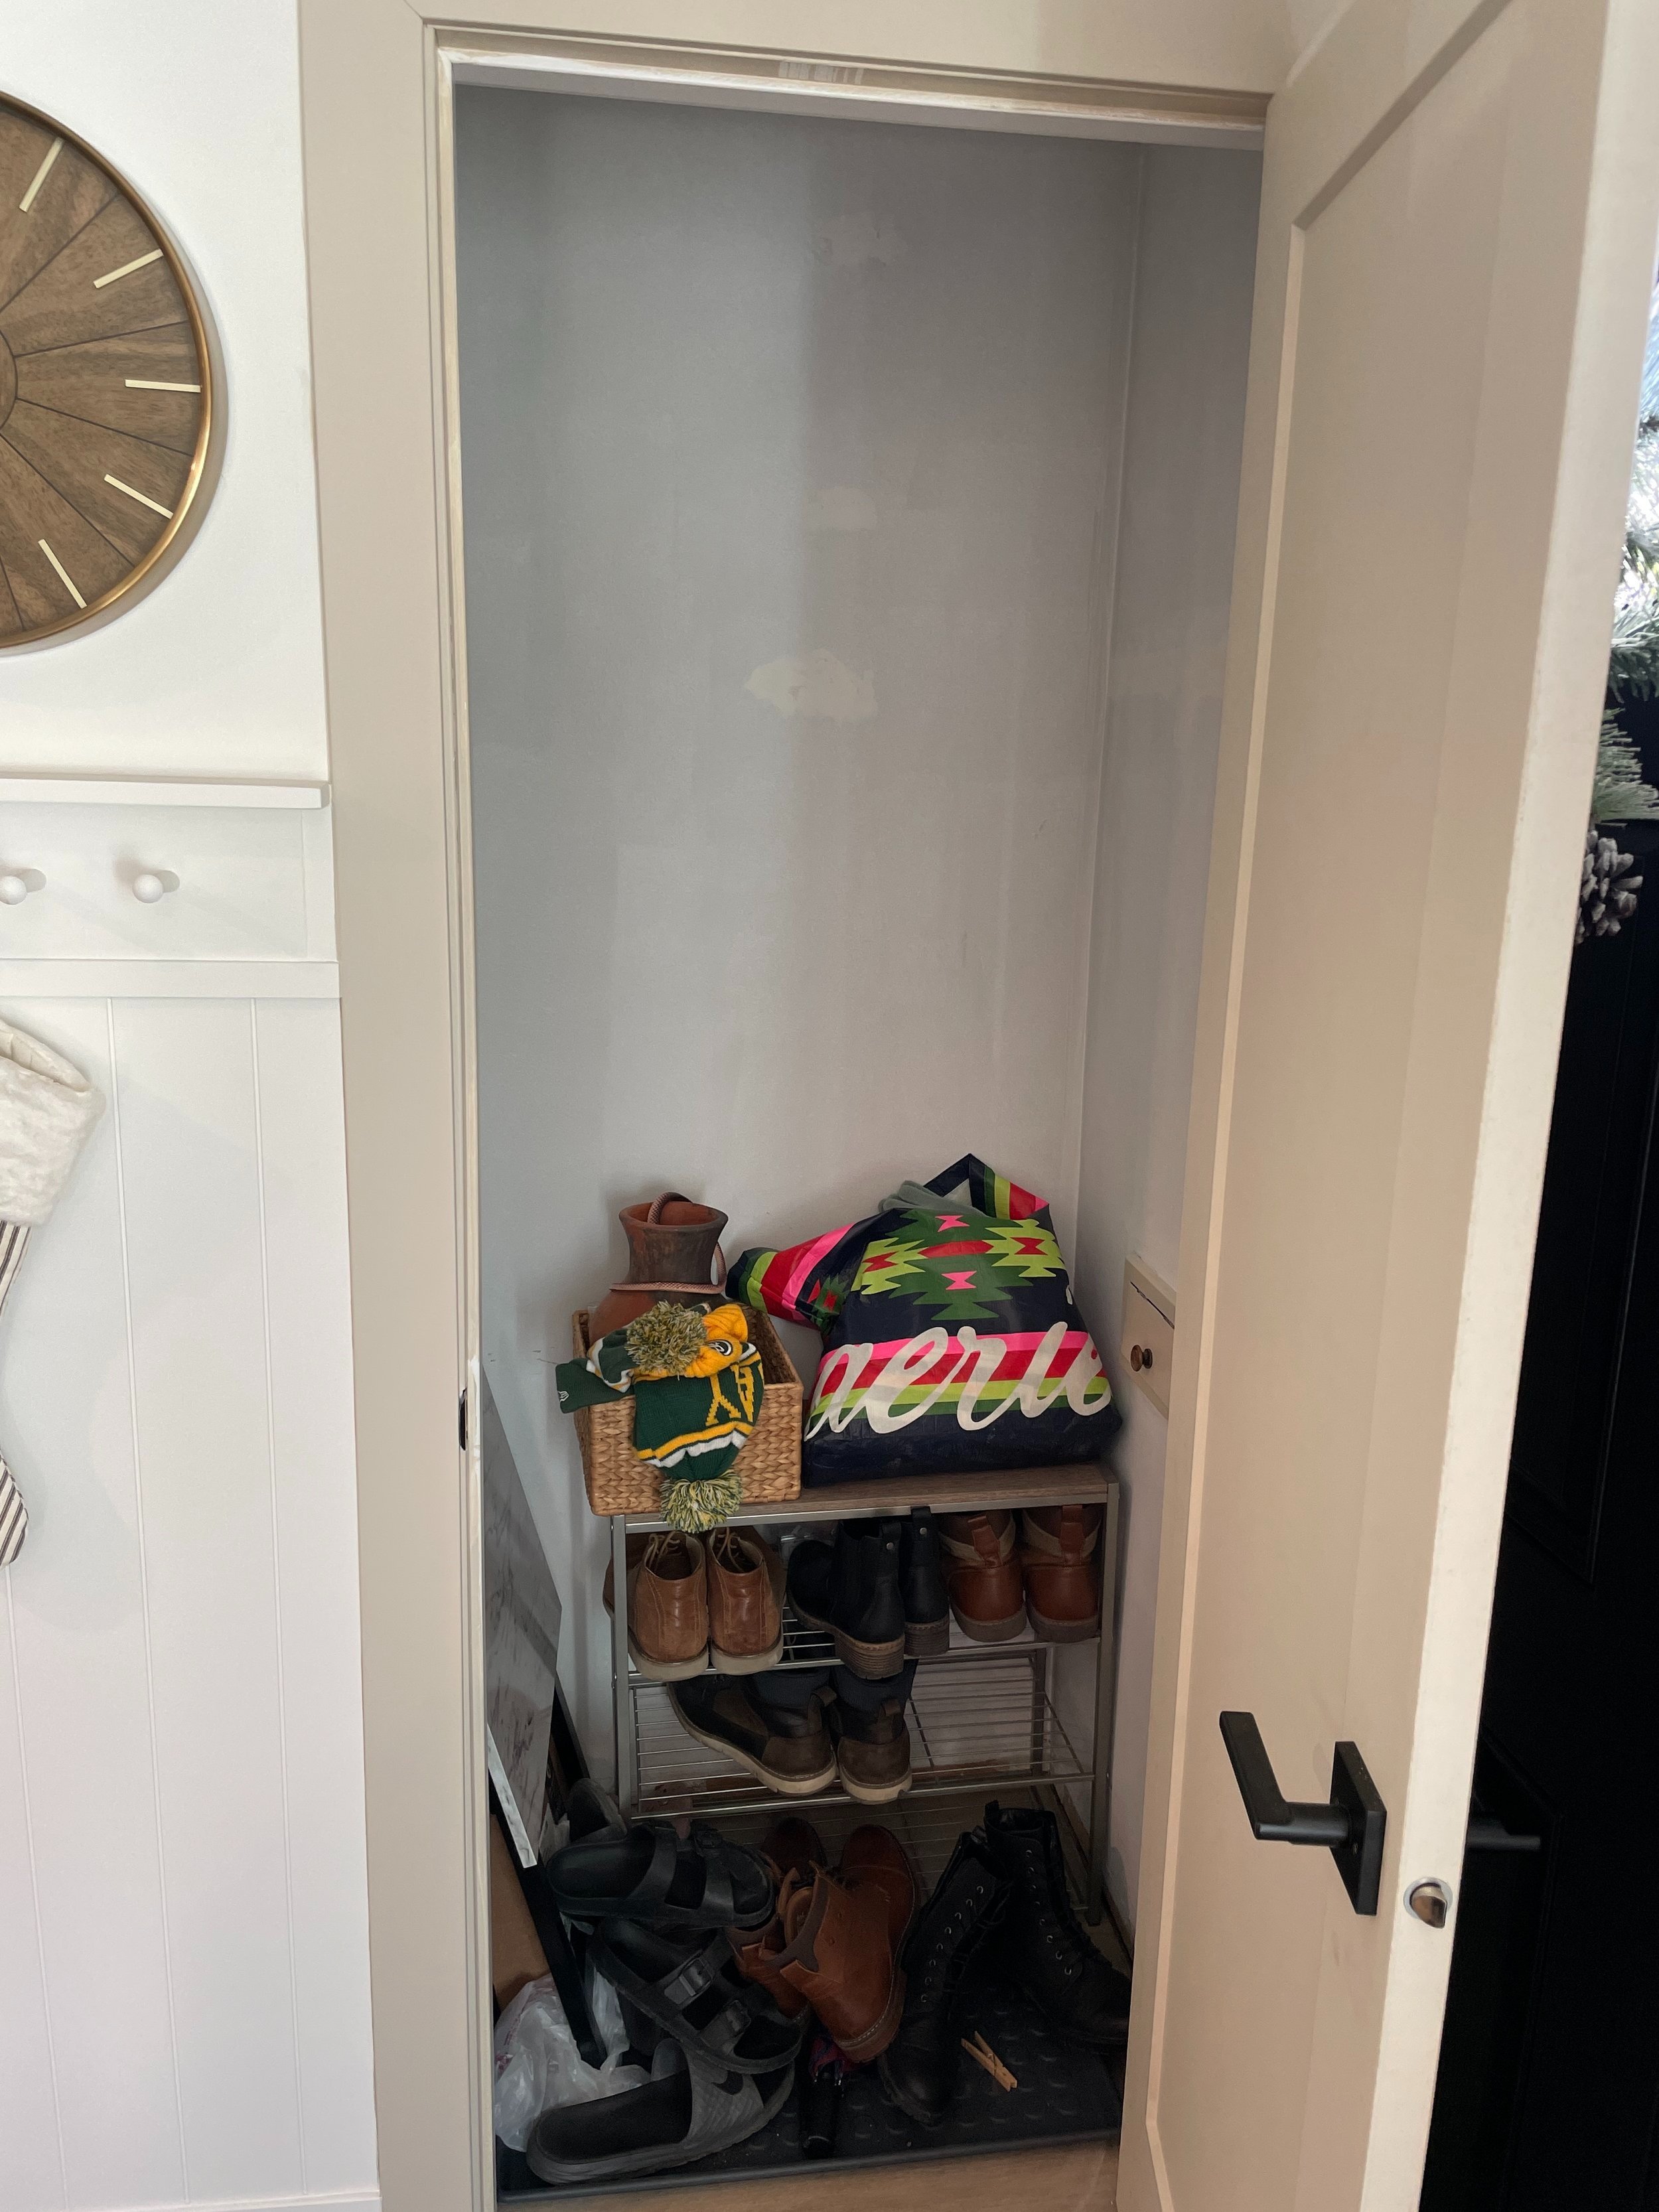
This closet is located right behind our front door in the living room. It’s the only closet we have on the main floor, which automatically makes it the “dump zone” for anything we don’t want out. This made for an absolute disaster of a closet! The closet itself didn’t have any organization to it, there wasn’t a rod to hang stuff on and it didn’t have any shelves. As a temporary solution I did move our old shoe rack into the closet to give our shoes a somewhat home. However, as you can see in the picture below, this did not solve our “dump zone” problem.


As I brainstormed what I wanted this closet to have, I realized I kept finding inspiration images that had a built-in cubby storage method for shoes and then a rod for coats with a shelf up above. I knew this was 100% doable for our allocated space. Knowing the vibe I was trying to accomplish, I moved onto getting exact measurements. I ended up being super pumped when I realized we had enough 3/4 inch plywood already in our garage that I could use to build the cubbies.
(Picture shown is from Shanty-2-Chic on Pinterest. Their profile is linked on the image.)

The real MVP tools of this entire project were both from Kreg Jig, the first being the Kreg Jig Circular Saw Guide. This tool was incredible because it made it easy and accurate when cutting through sections of an entire 8 ft x 4 ft plywood board. Without the guide it would have been more difficult making sure my cut was straight and it would have also been harder to reach certain areas. I would highly recommend purchasing this tool if you’re someone who would be cutting large pieces of wood/boards.

After we had all of our individual side pieces and shelf pieces cut it was time to assemble. To do this properly you should use pocket holes so that your screws are hidden and set into the wood instead of bulging out. I used to hate making pocket holes until I got my Kreg Pocket-Hole Jig 720 PRO about a month ago.
With this jig it makes it easy to create as many pocket holes as I need. (If you are someone who doesn’t want to spend that much on a jig you should take a look at some of their smaller systems because they have some smaller ones that I’ve heard great things about.) For my pocket hole placement on these boards I made sure I created holes towards each end of boards I was putting them on. That way whatever boards would be connecting would be secure in the front and back.
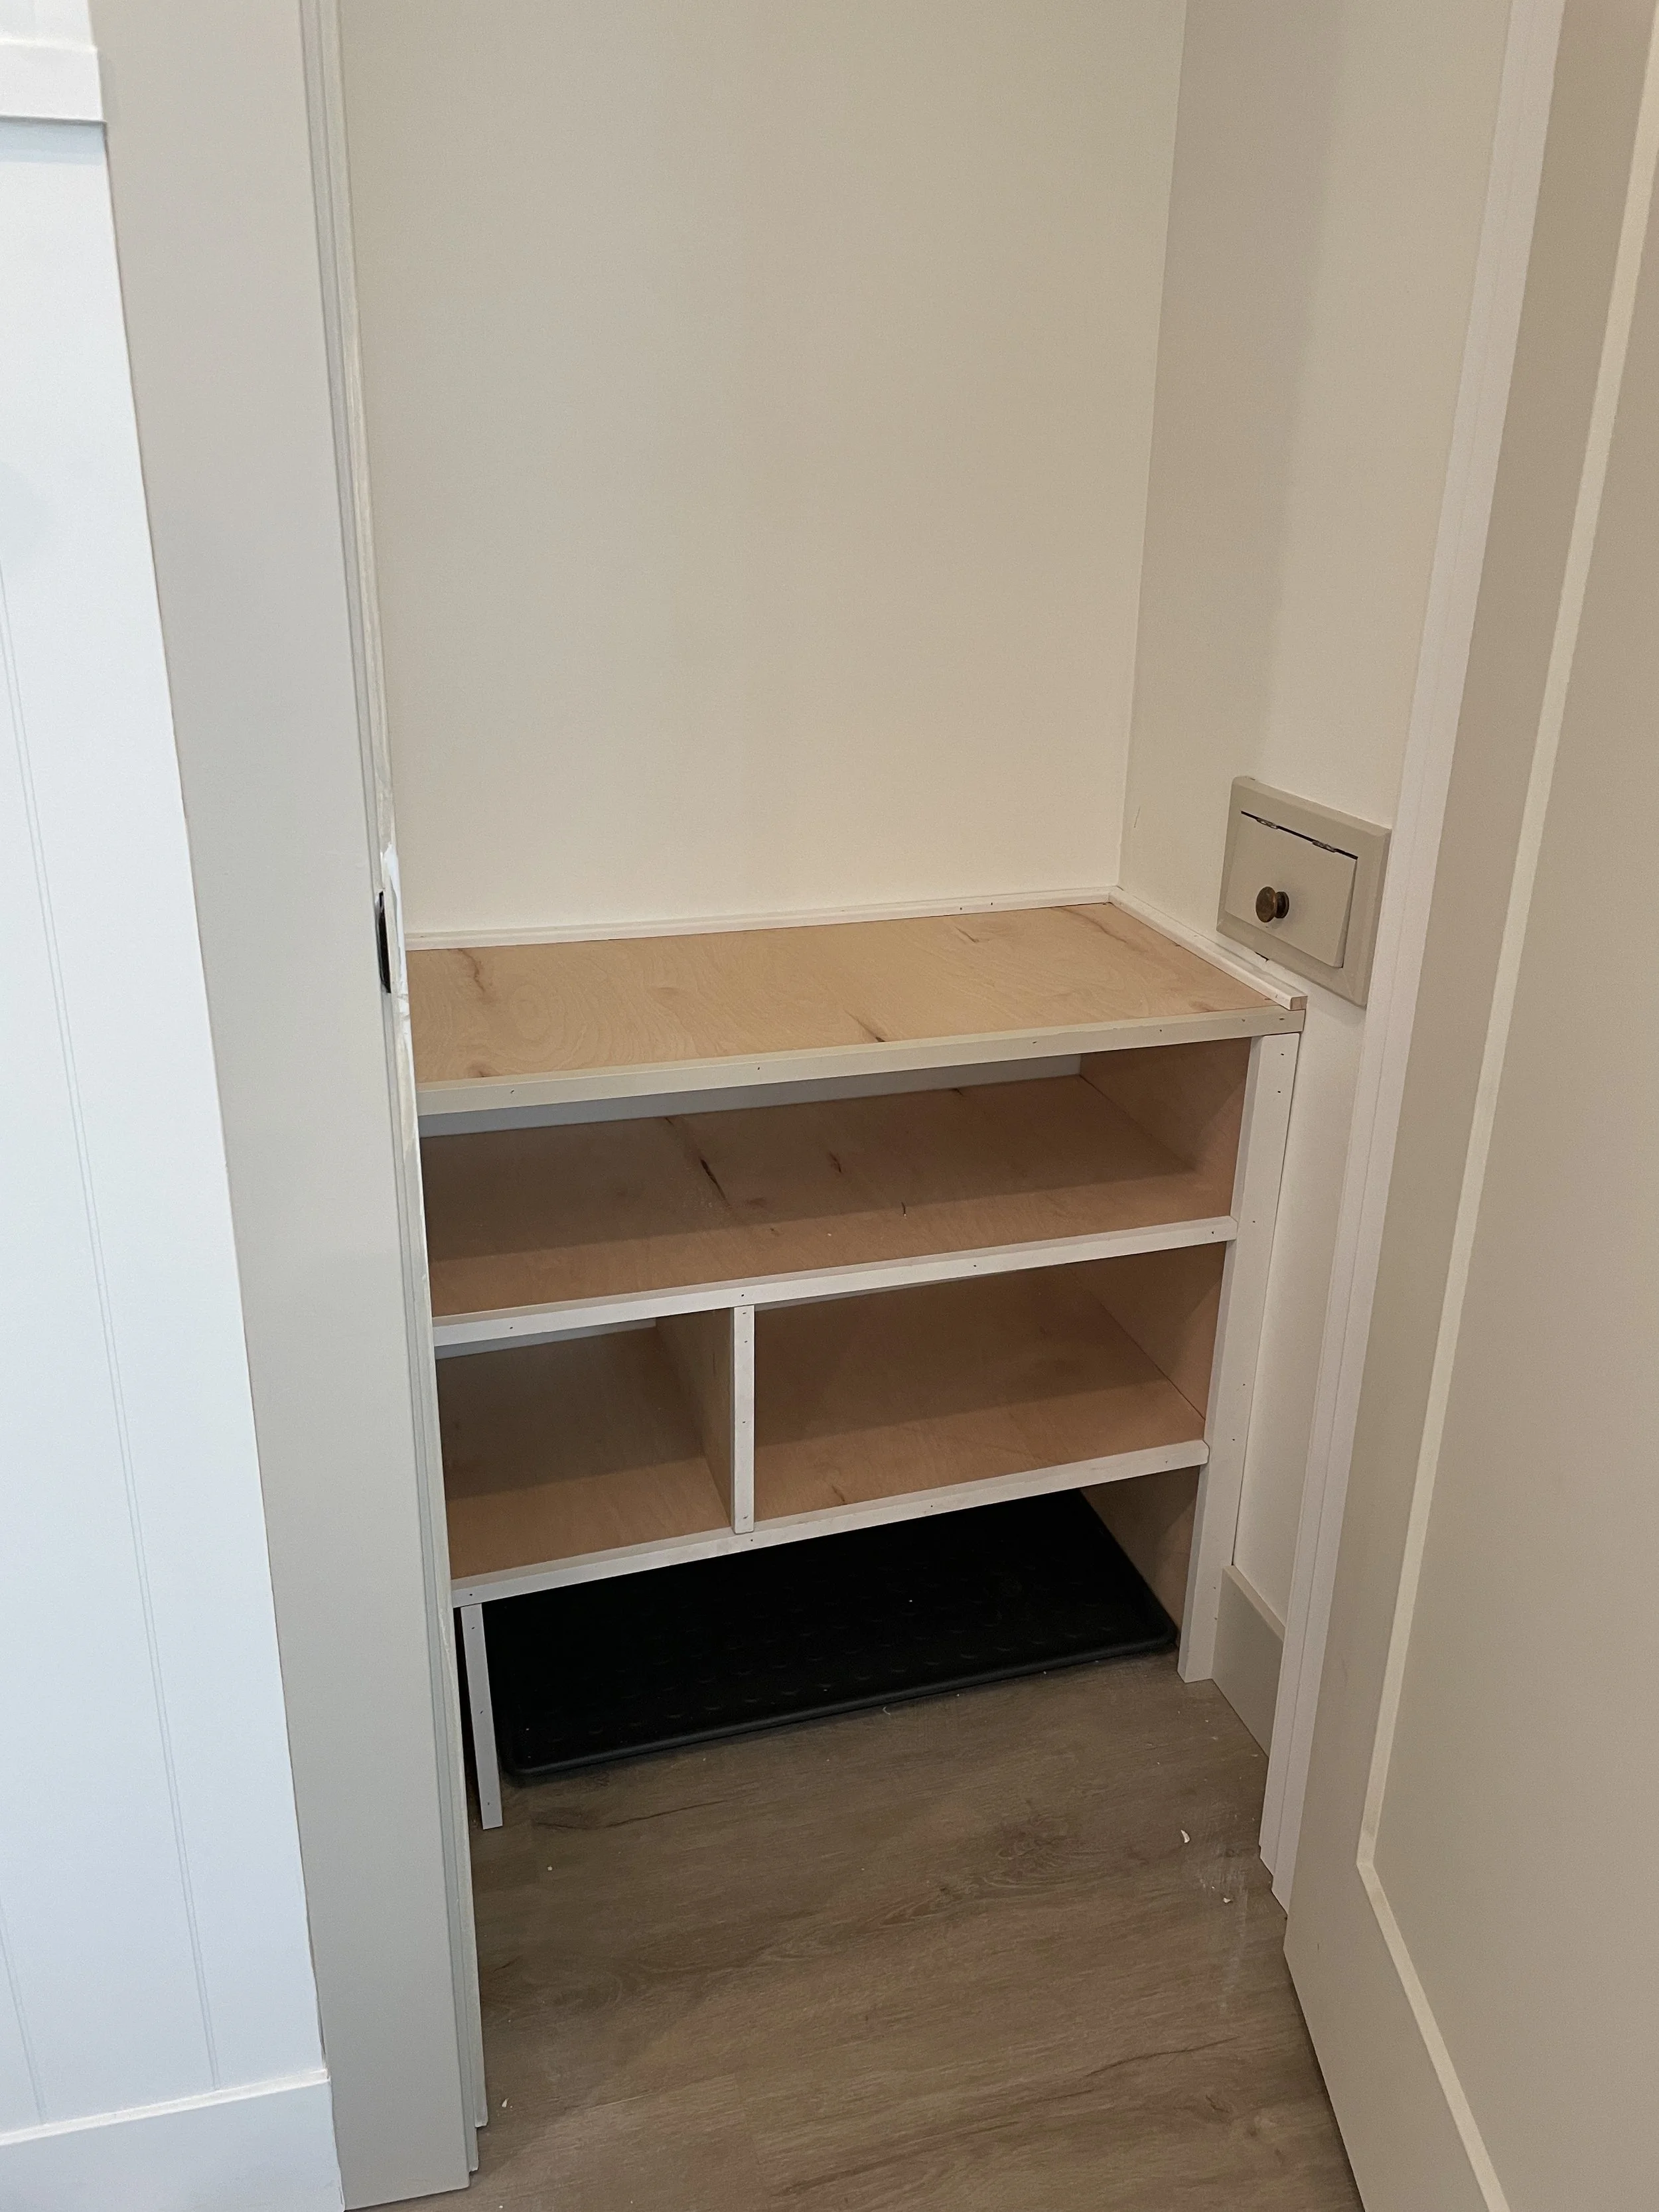
Once I brought my boards inside, with the predrilled pocket holes, I was able to stack the cubbies the way I planned and screw them together. After that, I decided to add some front trim pieces on with my brad nailer so the entire cubby system would feel more finished. Adding trim pieces not only gives a more professional look, but it also is a great way to cover the plywood edging that doesn’t look nice. Trim also closes any/all gaps between walls and the wood which is what creates the “built-in” custom look.
The next step was finishing up the top portion of the closet, the rod and the shelf. For the rod I bought a 1.5” wooden dowel from Home Depot and cut it down to the length I needed. I then bought some metal rod brackets to secure it to the wall. When it came to the shelf above, I used the same 3/4” plywood as I did on the lower cubbies and I secured it above with 3 smaller boards that were screwed into the walls. This acted as supports for the top shelf board. To finish that off, I took some scrap 1/4” plywood I had and ripped down a piece that could act as a front plate for a finished look.
Once all of the building/installing portions of the project were complete I moved onto caulking the seams between the wall and the trim while also wood filling any nail holes. Then I moved onto the painting portion which included primer first on the raw wood and then the color. To stick with my “use what I had” motto of the project I decided to paint it Muted Sage by Behr which was the same color I used for our guest bedroom accent wall. I thought this was a fun color to use in the closet because it’s unexpected and also helped tie in the other green accents I have in our home. After painting the color I made sure I added a top protective coat since the shelves would have our shoes on them a lot. For my protective top coat I used Varathane Transparent Matte Clear Water-Based Triple Thick Polyurethane.


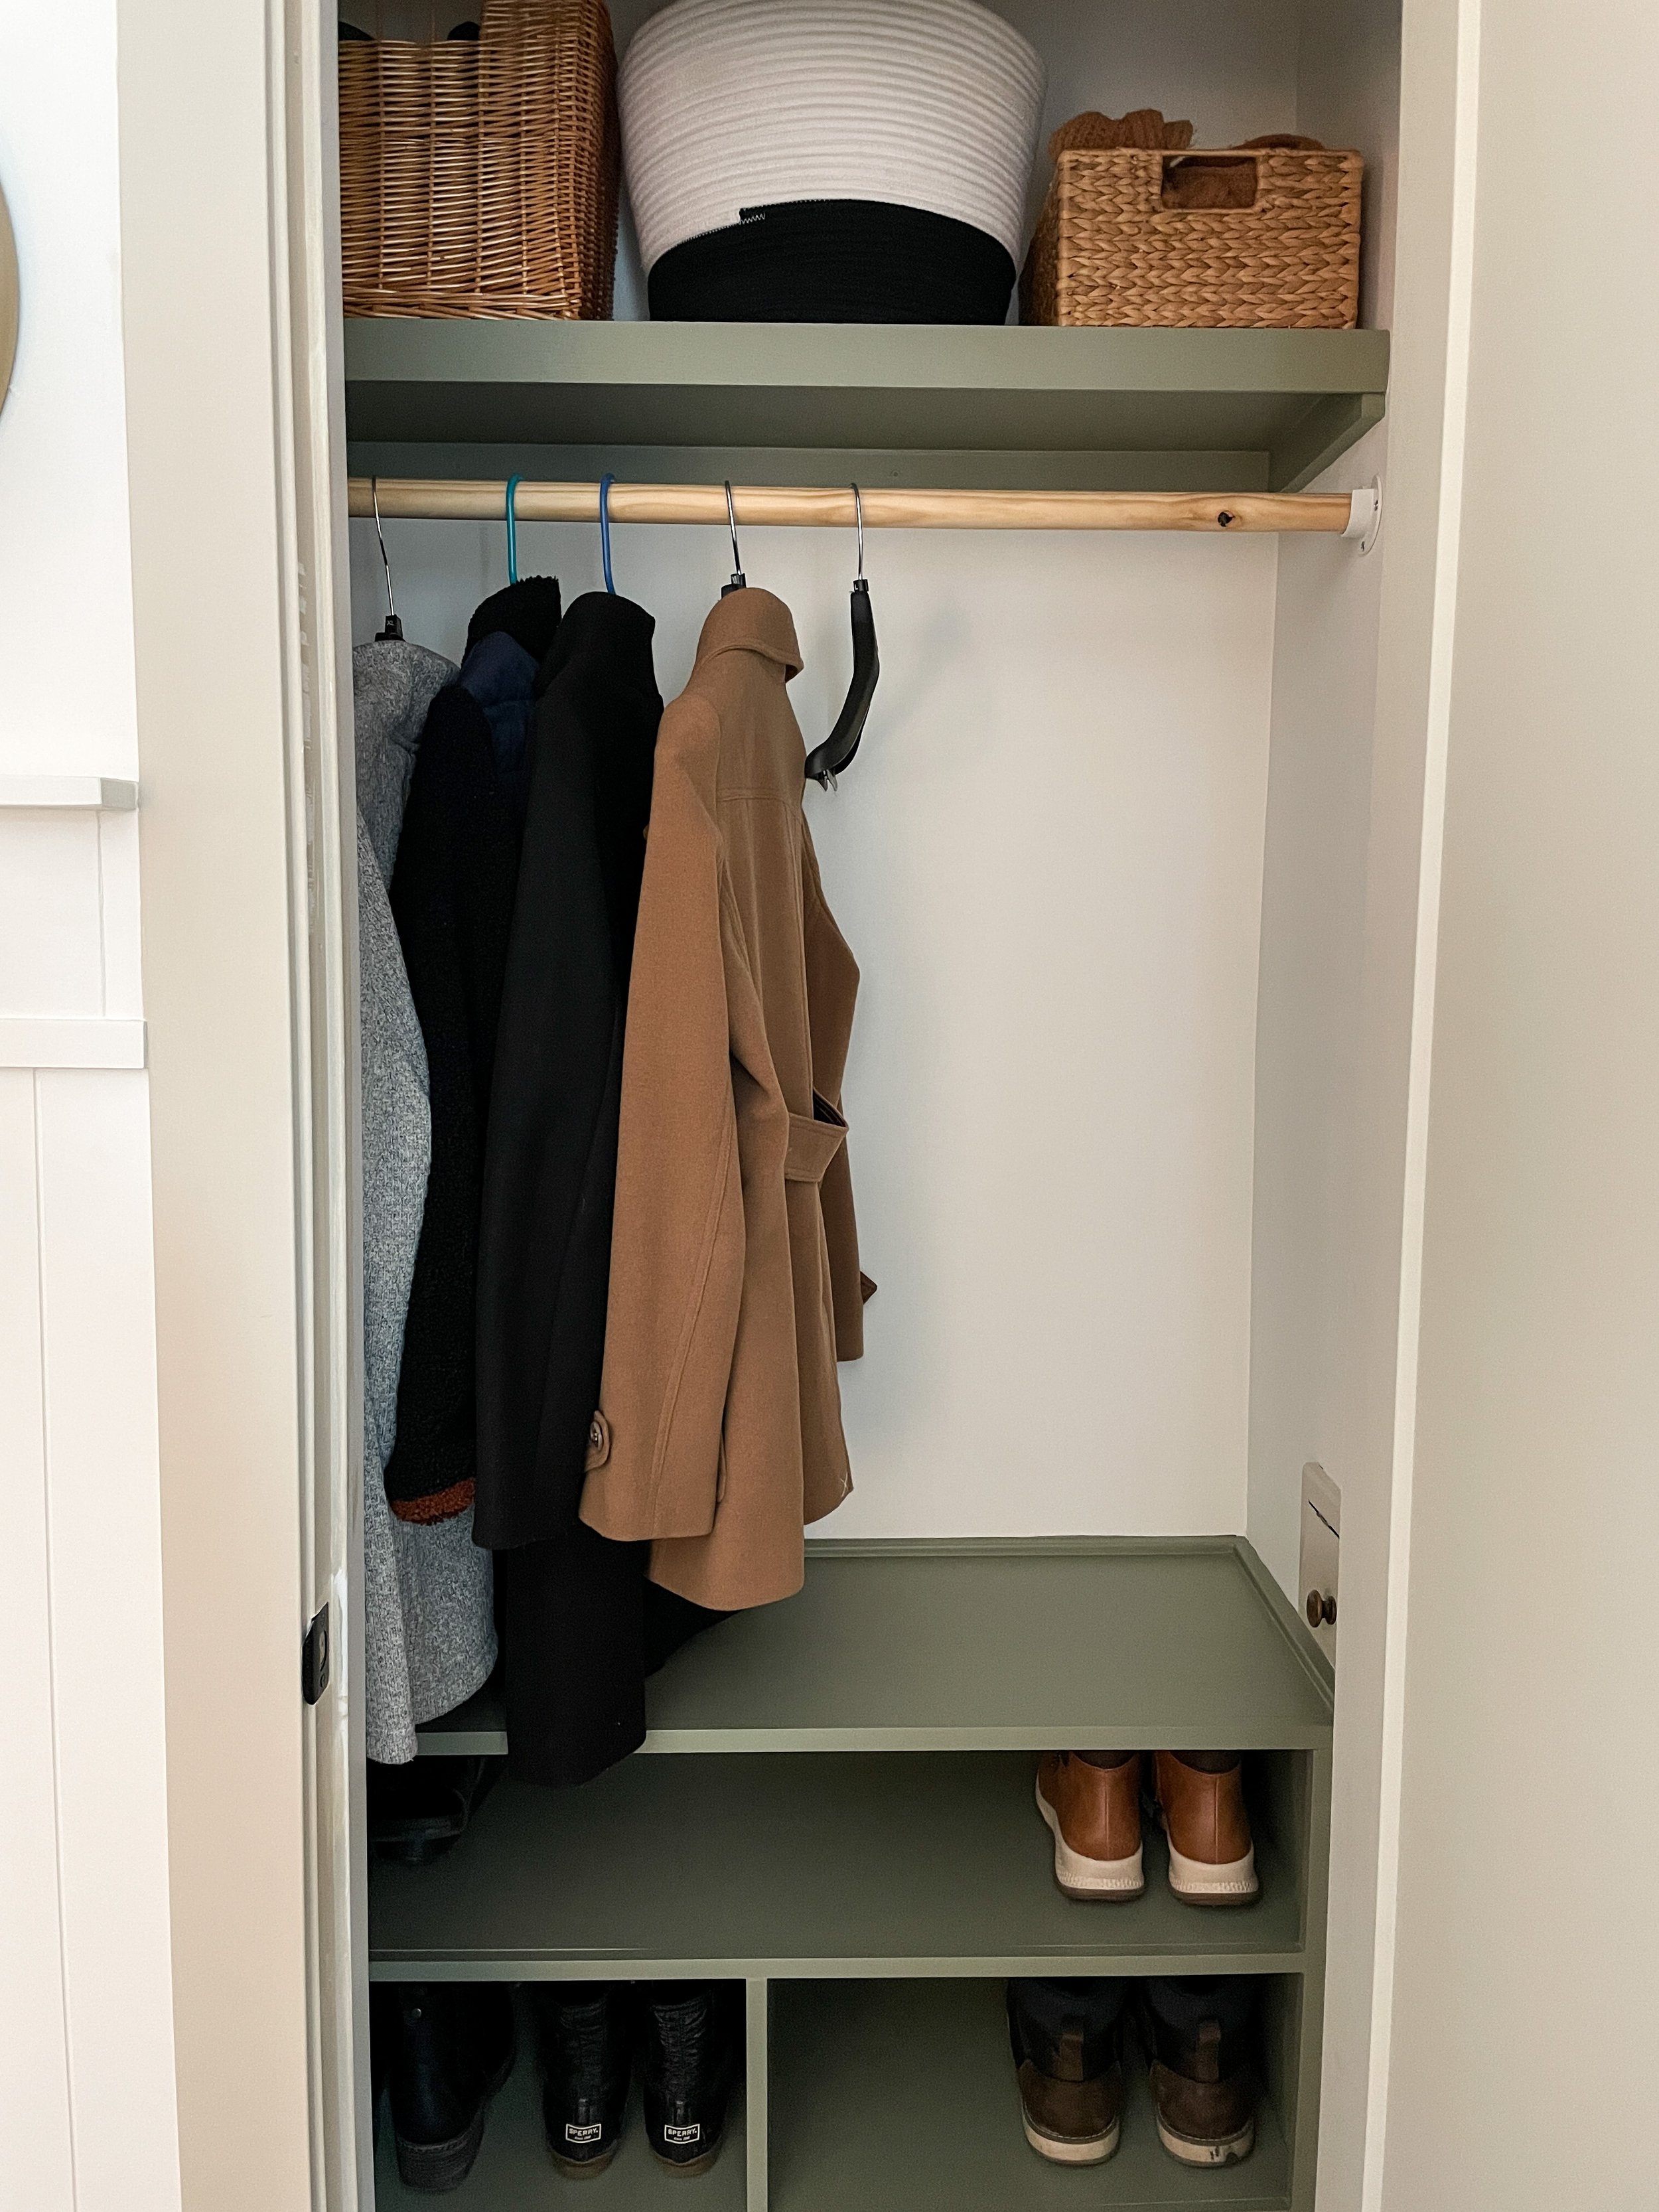
After all of that work, we now get to enjoy an organized closet that has a designated spot for our shoes, coats, and winter accessories in the baskets above. If you have a closet in your home that’s always a disaster I recommend creating something that is custom and gives your items a specific home. You can feel free to reach out to me if you’re not sure what to do with your storage space and we could work together to create a plan! I’d love to hear from you in the comments below since it’s been so long since I’ve shared a blog post. Even just a Hi Marissa would bring a smile to my face!
Cheers!
Marissa